I don't get every recipe I make from Allrecipes.com or Kraft.com or from my Mother-in-law, although most of them I do. Every once in a while I'll find them in an advertisement for a particular item. For example, this recipe for Cajun Chicken Pasta came from a Sargento cheese ad, although I've made it without their cheese.
Not every recipe I try is a winner and then some are and I mess them up. This is one of those recipes. I first prepared this recipe back in...I can't remember and it really doesn't matter. It's been a while and I liked it the first time so I decided to make it again.
After cooking the pasta and cooking the chicken, I remembered that the last time I made it I felt like the amount of cajun seasoning the recipe called for didn't seem like enough, so I decided I'd double it. OOPS! Not a good idea on a couple of levels. First, deciding to double it was crazy. Maybe a tad more would've helped. Second, instead of adding a total of 4 TEAspoons, I used 4 TABLEspoons. Ya see my problem?
After preparing it almost according to the instructions and plating it up, photographing it and making sure it was still hot enough to be served, the family sat down to eat. BTW, I made myself a batch without chicken.
O.M.G. AWFUL! The salt content was enough to make your tongue fall off. I was wiping sauce off the pasta and trying to make it edible. My husband was so hungry he ate it even though he thought the salt was too much too. And, my son, who we're trying to get to eat new things, was told it was a PB&J night. I wouldn't let him near the stuff.
So...I will make this again after we have the sodium flushed from our bodies and next time I will follow the recipe exactly and if there's not enough seasoning, I'll just sprinkle a little on top.
My husband really likes Tilapia so I've been looking for recipes that I think he might enjoy. I came across this recipe in Parade Magazine back in late 2009. It looked easy enough to make so I've finally decided to give it a try. I decided to use regular tortillas instead of the whole grain tortillas we always use. I diced up roma tomatoes, fresh cilantro and red onion. I mixed the salsa and sour cream to make a zesty sauce and I completed the meal by brushing the fish with a little EVOO and S&P and tossing it in the pan. Wow! It's really just that easy. After the fish came out of the pan, I drizzled fresh lime juice on it, then let it rest for a few minutes before flaking. Does fish even have to rest?
The result, as reviewed by my husband, was fantastic...minus one thing...it wasn't very hot. I have found an issue with blogging. I plate up dinner and then spend time photographing it, then I serve it. Oops! After putting effort into making a nice tasting, visually appealing meal, the effort is practically wasted if it's not served at the ideal temperature. I won't make that mistake again! Thankfully it was good enough that he ate everything that I prepared. I even made a couple with no fish (being a vegetarian and all) and it was so good! Everything was fresh and the flavors worked so well together. I'll make it again and skip the camera work.
Ingredients: 8 - 6" flour tortillas 1/2 cup sour cream 1/2 cup salsa S&P 3 - 8oz fish fillets (tilapia, haddock, flounder) 2 tbs EVOO Juice of 2 fresh limes 1 small red onion, thinly sliced 2 ripe roma plum or beefsteak tomatoes, diced 2 cups red cabbage, finely shredded (optional) fresh cilantro leaves
Instructions: 1. Preheat oven to 300F. Stack the tortillas on top of each other and wrap in foil. Place in oven while you prepare the fish. 2. Whisk together sour cream and salsa in a small bowl; season with S&P. Cover and refrigerate. 3. Heat a grill pan or nonstick pan over medium-high heat. Brush the fish on both sides with oil and season with S&P. Cook the fish until golden brown on both sides, about 4 minutes per side. Remove to a plate; drizzle with lime juice. Let rest for 5 minutes. Using a fork, flake the fish into large pieces. 4. To serve: Put some fish in the center of the tortilla and top with onion, tomatoes, and cabbage, then drizzle with sou-cream sauce and cilantro leaves.
I continue on my journey of planning our our dinners a month-at-a-time, while actually making recipes I keep collecting. I decided to try something that I know, if I was still a meat-eater, that I'd love. French Dip with warm au jus.
I adapted a recipe from Allrecipes.com, using other people's comments to make my French Dip the best it could be. But first, I had to figure out which cut of meat to use. The recipe calls for rump roast, but many people also used chuck roast or sirloin tip. I enjoy reading people's comments, but figuring out what to add to my shopping list meant doing a little homework.
Rump roast and and chuck roast are very flavorful and tender, while sirloin tip is less fatty. I decided to look for sirloin tip because I knew it would be tender in the crock pot. Alas, I was unable to find it and bought a chuck roast instead.
The end result was my kitchen smelled fantastic all day and my family loved it (served it to four people). They all said it was worth making again, except my son who isn't a red meat fan yet.
Ingredients
3-4 pounds chuck roast
1 (10.5 ounce) can beef broth or consomme
1 (10.5 ounce) can condensed French onion soup
1 (12 fluid ounce) can or bottle DARK beer
1 tsp garlic powder
1 tsp onion powder
1 tbs Worcestershire sauce
½ tsp fresh ground black pepper
6 French rolls
2 tablespoons butter
Directions
Trim excess fat from the chuck roast, and place in a slow cooker. Add the beef broth, onion soup, beer and spices. Cook on Low setting for 7 hours.
About 30 minutes before serving, cut the meat then placed it back into the juices to cook a little bit more.
Preheat oven to 350 degrees F (175 degrees C).
Split French rolls, and spread with butter. Bake 10 minutes, or until heated through.
Slice the meat on the diagonal, and place on the rolls. Serve the sauce for dipping.
Using the crock pot is so easy with just a little bit of planning (making sure you have all of the ingredients and getting it started on time). I love cooking with the crock pot because dinner is virtually taken care of by late morning. If I worked full-time I'd probably be on the look out for recipes that take 10 hours to cook. But since I don't, a 5-7 hour cooking time works for me.
I'm always a bit weary about cooking chicken in the slow-cooker because I've read so many recipe reviews where people comment that the chicken was over cooked, usually in a "beyond shredded" way vs. a dry way. But I decided to give this one a shot since I had plenty of bell peppers on hand and some cilantro to use.
I slightly adapted a Kraft website recipe...
1 lb. boneless skinless chicken breasts, cut into 1-inch-wide strips
2 Tbsp. (1/2 of 1-1/4-oz. pkg.) Taco Seasoning Mix
2 Tbsp. flour
1 each green and red pepper, cut into 1-inch-wide strips
1 cup frozen corn 1 can black beans
1-1/2 cups Medium Salsa
1 cup Shredded Cheddar Cheese
TOSS chicken with taco seasoning and flour a ziploc bag then empty into slow cooker. Stir in vegetables and salsa; cover with lid.
COOK on LOW 6 hours (or on HIGH 3 hours).
STIR just before serving; top with shredded cheese.
I served it with brown rice and garnished it with fresh cilantro. The first time I made this my husband commented that it needed a little extra kick, so I used medium salsa this time and that seemed to do the trick. My son asked for more chicken and he ate the peppers without a struggle! We're making progress!
As I continue on my journey of attempting to plan out dinners a month at a time, I found again, that being flexible is key. My Spicy Garlic Lime Chicken recipe was planned for February 5th. One thing lead to another and I had to reshuffle it to last night. Since the only fresh ingredient the recipe calls for is a lime, it was easy to push this one until a later date.
Besides planning a month at a time, I've become much stricter with regards to making my son eat something other than chicken nuggets. Last night was not the struggle I anticipated, but it came with bribes that I wish weren't needed.
After mixing the spices and heating up the pan, I sauteed the chicken to a perfect golden brown. It cooked a lot quicker than the recipe called for. But since I was watching it closely, disaster was avoided. As it was cooking, it smelled great and looked fantastic. I served it with brown rice cooked in a mix of water and chicken broth. And, because I've been known to get into the rut of serving a plate of fabulous beige food, I steamed some haricots verts.
My husband loved it! He liked the kick that the spices gave the chicken and the flavor of the lime (which wasn't as pronounced since I didn't get as much juice out of the lime as I had wanted). It wasn't too hot or overpowering, but flavorful. My son, after eating half an apple, declared he was hungry. When I showed him his plate, complete with rice and green beans, the whining started and the bribes began. Try a piece of chicken and I'll give you an animal cracker. It worked and he liked it and proceeded to eat all of the chicken on his plate. Next, the beans. I broke them and stuck them on the prongs of his fork. And, he ate them...for more animal crackers. And finally, the rice. He hasn't eaten rice or green beans in two years. But, the ever powerful bribe enticed him to complete every morsel on his plate. And, although I didn't like bribing him, the animal crackers are low in sugar and one day...in a galaxy far away...he won't be offered a bribe but a restful sleep on an empty stomach.
In a small bowl, mix together salt, black pepper, cayenne, paprika, 1/4 teaspoon garlic powder, onion powder, thyme and parsley. Sprinkle spice mixture generously on both sides of chicken breasts.
Heat butter and olive oil in a large heavy skillet over medium heat. Saute chicken until golden brown, about 6 minutes on each side (or less if your chicken is thin). Sprinkle with 1 teaspoons garlic powder and lime juice. Cook 2-5 minutes, stirring frequently to coat evenly with sauce.
I have hundreds of recipes that I've got saved on my computer. If I'm up late at night and can't sleep, I'll browse through food blogs and recipe web sites. If I see something that I'd like to prepare someday, I'll save it. Sometimes I get adventurous and try a recipe and other times I fall into a rut and make the same dishes over and over and over again.
This month I decided to take a blank calendar and come up with a plan for dinner for every night of the month. I've tried doing this a week at a time, but I'm really inconsistent about doing it and then I lose my coordination between the menu, my grocery list and the execution.
So, this month I took about 45 minutes and filled out the calendar with meals, including nights for left-overs and a night out (or 3). During this time I also put a week-by-week shopping list together. I took an extra minute to plan how not to waste some items, like cilantro. Using 2 tablespoons in a recipe and having the rest of the bunch left over usually means it'll go bad - at least at my house. So, I grouped certain recipes based on ingredients I knew I'd need to use before they went bad.
Now it's February15th. I've had to make quite a few adjustments to my dinner calendar. I didn't account for the Super Bowl and that menu. Then we went bowling one night so I moved that night's dinner to another night. And one night, even after so much careful planning, I forgot an essential ingredient and it was getting too late to go to the grocery store. I learned a lesson though...ALWAYS have a frozen back-up on hand! This came in handy for this occasion and it'll come in handy for the night that I really am not up for cooking.
On with the Caribbean Nut-Crusted Fish. This recipe comes from my ever faithful Kraft website. I know it's good to eat fish - for those that eat fish. So, to follow my dinner calendar I've got one fish meal a week.
After mixing together the chopped nuts, fresh cilantro, minced garlic, peanut oil and lime zest I was almost ready to eat the topping! It looked and smelled terrific. The recipe called for covering the fish (I used tilapia) in lime juice and then coating with the topping. Then, it called for baking it for 10-12 minutes at 350F. On the packaging for the fish however, the cooking instructions call for baking it at 400F for 30-35 minutes. My husband suggested I follow the packaging. I decided to jump online and read the recipe reviews. Out of 20 reviews, no one said that it needed more time or that it was undercooked. So, following the recipe I go, I go.
After 12 minutes I attempted to see if the fish was flaky by ever so slightly taking a fork to it. I was trying to be so careful so that testing it wouldn't mess up the subject of my photo..I mean, my husband's dinner. It looked good to go so I plated it and spent about 10-ish minutes trying to photograph it with my new camera. My house has such crappy lighting that I find the task frustrating. But I took a suitable photo and determined that the food was probably almost cold by then. I popped the whole thing back in the oven for about 5 minutes on low heat.
After all was said and done, my husband really liked it! He likes having saucy dishes and this one wasn't saucy, but he really enjoyed it and said he'd enjoy having it again. Success!
The Super Bowl. What images does that conjure up in your mind? Party. Football. Commercials. Food. Lots and lots of food.
This year, for Super Bowl XLV, we had neighbors over with their children to watch the big game. We typically go to a party, but this year Super Bowl Sunday fell on a night that just happened to be my night to pick up "the Panera donations". Meaning, where ever I was watching the game, I'd have to drop everything and leave at 7:30 PM. That's a whole other story.
So, with menu planning on my mind, I visited the Kraft Food website and found a recipe for Potato Bites. This recipe seemed a lot easier to make then potato skins. There were only 3 reviews on the site at the time and the only real comment regarding the preparation was "it's messy to make". Thanks. Rolling mashed potatoes into balls sounded "clean" to me.
So boil, mash, scoop, stuff and roll. I did it 24 times, just like the recipe called for. These balls were huge and looked good. (Jokes were made about this while people tried them). After baking for about 15 minutes, I served them. They turned out really well, but could've used more time in the oven since the cheese was still more chunk then a melty, gooey center. Yeah, melty is not a real word. I know.
We have some left over so it'll be interesting to see how well they reheat.
Every Friday night is "Taco Friday" here at my house. A friend of mine has "Taco Tuesday" at her house and I thought the idea was so good that I decided to steal it for my family. Knowing what your family is going to eat one night out of every week means I only have to attempt to be creative six other nights of the week. And, who wouldn't want to eat their favorite meal once a week? It's one of my favorites, and since I cook 99% of the meals, the husband and son must eat it every week too. (Well, realistically, my son doesn't eat it. But maybe that will change one day).
We're not a very exciting family so the chances of us heading out on a Friday night are slim to none and tacos are a super fast dinner. We always have shredded cheddar on hand. I manage a restaurant for the closing shift on Wed. and Thurs. and our diced tomatoes are only supposed to be used for that day's business. So...if I remember, I snag a soup cup full of diced tomatoes to use for Friday dinner. Seems like a waste to toss them and using them the next day to make a $7+ salad doesn't seem fair to the customer - so they are mine! Wa-ha-ha!
So last Friday night I was preparing vegetarian tacos for dinner. If I've got organic ground beef on hand I'll make it for my meat-eater husband. Last Friday he was out of luck. So as I was preparing the meal (which I can do in as little as 12 minutes), I pulled chips out of the pantry. I love tacos, my husband prefers taco salad. So anyways...I was pulling chips out of the pantry and found I had two open bags. Mission rounds are my favorite. We also had those kind that look like little chip cups. Light bulb moment...and there we have it. The creation of the mini-taco salad appetizer. I secretly made three and presented it to my husband. He looked so excited as I place the plate in front of him. Honestly, I know the presentation is wasted on him and I know he was hungry, hence the excitement of seeing food placed before him. But...after hearing how good they were, even though they were vegetarian, I decided to delay dinner while I made myself a couple. OMG! So good. A little bit of this and a little bit of that sitting on a tortilla chip was the perfect amount of every ingredient.
After preparing a few more to photograph, we finally had dinner. And, we both went back for seconds. Yum. Every "Taco Friday" is going to begin with Mini-Taco Salad Apps from now on!
Oh, and as a side note, I'm getting a new camera in February! I am so excited that I've been literally dreaming about it. Hopefully my photographs will look more appealing after I learn how to use the camera, since it'll be sooooo much better than the one I currently use.
The weather forecast is calling for snow tomorrow. It's been cool and windy a lot lately and it seems like the right time to make chili. Being a vegetarian married to a meat-eater can be exhausting in the kitchen, but today I was feeling energetic (probably because I remembered to take my vitamins).
I often use Kraft's A-1 Chili recipe but today I decided to wing it. Sauteed onions, green chiles, diced tomatoes, ground beef, kidney beans, chili seasoning and a dash of A-1. After browning the meat, I tossed everything into the crock pot. Dinner done...done for tomorrow night's dinner too!
I didn't feel like making two dinners, but even though I planned on serving chili to the whole family, making a vegetarian chili was a necessity. But chili is so easy to make and using Morningstar Crumbles is even easier than browning meat. The veggie chili is the same as the other one, just substituted the Crumbles.
I don't have two crock pots so I let my veggie chili simmer on the stove on low. I got distracted the didn't stir it for a while and some kidney beans burnt a bit. Oh well. Now I know what to ask for next Christmas!
Because the meaty chili looked and smelled better, I give it first place in the chili cook-off. I don't even have to taste it to know it's better. Maura, Brooke, Mary - you missed out on some yummy chili!
It's a new year and another opportunity to use my bread maker. Today I made my own pizza crust. I love knowing exactly what we're eating and I love using kitchen equipment.
After working backwards from what time that I wanted the family to eat dinner to figure out when I needed to prepare my pizza crust, I put all of my ingredients together in the bread maker. I punched in the correct code and my crust was in the making!
Fast-forward to the dough being ready. I took it out of the bread maker and plopped in onto a floured countertop and rolled it out to fit my sheet pan. I prepped the toppings, popped it into the oven and 19 minutes later dinner was ready. Preparing you own pizza dough using a bread maker is sooooo much easier that rolls (see posting from 12.24).
Next time I'll be sure to leave more crust. I loved that the pizza crust was chewy yet firm enough to pick up without all of the ingredients sliding off. And, the crunchy edges were the best!
It's no secret that I am a fan of Allrecipes.com. I love that you can type in any number of ingredients and it will suggest recipes to try. I love that it has ratings and comments. I love to try 4-5 star recipes and I always read a bunch of comments before starting. It's good to know that a bunch of people thought the recipe was too sweet and recommend cutting back on the sugar, etc.
Allrecipes.com emails me daily and weekly recipes. Two days ago I stumbled upon one for Butterscotch Bread Pudding. It sounded awesome so I decided to run out to the store and get some butterscotch chips. And, because my bread maker was given a second chance at life, I decided to bake my own bread for the pudding.
This bread pudding was so good that it didn't even need sauce and it was even better the next day. The butterscotch chips almost completely melted into an awesome reward for a dessert well done.
My husband has his garage and I have my kitchen. We have a "rule" that when something new comes in, something old must come out. For an early Christmas gift I was given a beautiful Professional Kitchen Aid Stand Mixer. I love it as though it's a piece of art. I've used it three times and I love it so much I wish I could marry it. ;) As the stand mixer came in, a bowl came out. Just a bowl. My husband wasn't impressed with my "out" selection and suggested I "out" my bread maker.
We received our bread maker as a wedding gift almost 6 years ago. I've used it to bake white bread, jalapeno cheddar bread and even the non-successful strawberries and cream bread. I was on a kick for a while, but since it's so big and I love open counter space, it got put away.
After collecting a little dust as it sat under the tupperware and hearing the threat of being ousted, my bread maker came out of hiding and has plans for a work out.
Whole wheat roll recipe: about 6 ingredients. Easy! The bread maker mixes, kneads, rises the bread dough. All I have to do it punch it out and let it rise again, portion it out and roll it into rolls.
Augh. Not easy. The directions, upon further investigation, said that whole wheat usually needs a third rise. Mine did not. After punching out the air from the first rise, I let it rise again. It was so hard to shape into rolls. After calculating the weight of each roll to ensure that I got the 18 each the recipe called for, I only got 16. Stupid math.
After rolling and rolling those stupid rolls, my arms were hurting and I was having horrible flashbacks to the worst memories I have of college. I was working for the Chef of the University President and I got to select menu items for a dinner the President was hosting. The Chef always encouraged me to choose items that I wouldn't normally get the chance to prepare. I chose homemade rolls. All the work that goes into it is not worth it!
Sure, making a loaf in the bread maker is easy, making a loaf by hand is not. Making rolls where the bread maker starts the process seems easy, but finishing the rolls is not.
Alas, the rolls came out better than expected. My Dad snagged one right out of the oven to taste test it. I got a thumbs-up from the family. Even with the encouraging feedback - never again will I make rolls!
I have the honor of hosting Christmas Dinner this year. There will be 12 of us. I grew up eating a traditional English Christmas Dinner consisting of Roast Beef and Yorkshire Pudding. Even though I am a vegetarian now, I still consider this to be one of the best dinners on Earth (even though I haven't eaten beef in about 22 years). I wanted my guests to have a fantastic meal the way I remember it.
My English Mum once gave me a British tea towel with a Yorkshire Pudding recipe on it. I've only made Y.P. maybe once or twice myself and since it had been so long, I decided I needed to do a test run before trying to serve it to twelve of us.
Count down to Christmas Dinner: 11 days.
My recipe calls for eggs, flour, salt, milk, water, dripping (or pan spray for us vegetarians). Simple. You mix it, let it sit for an hour, warm up your muffin tin in the oven (with the drippings) and bake. Before it was re-named Yorkshire Pudding it was called Dripping Pudding. Thank goodness that a recipe author rename it!
"A Yorkshire pudding isn't a Yorkshire pudding if it is less than four inches tall, says the Royal Society of Chemistry"; true Yorkshire people would disagree - the modern trend has been to aim for Puddings of almost Souffle proportions." - Wikipedia.
As they bake they rise so impressively. As they are taken out they fall. This is a good thing since it gives a place to put your gravy.
Update: The Y.P. turned out beautifully on Christmas Day!
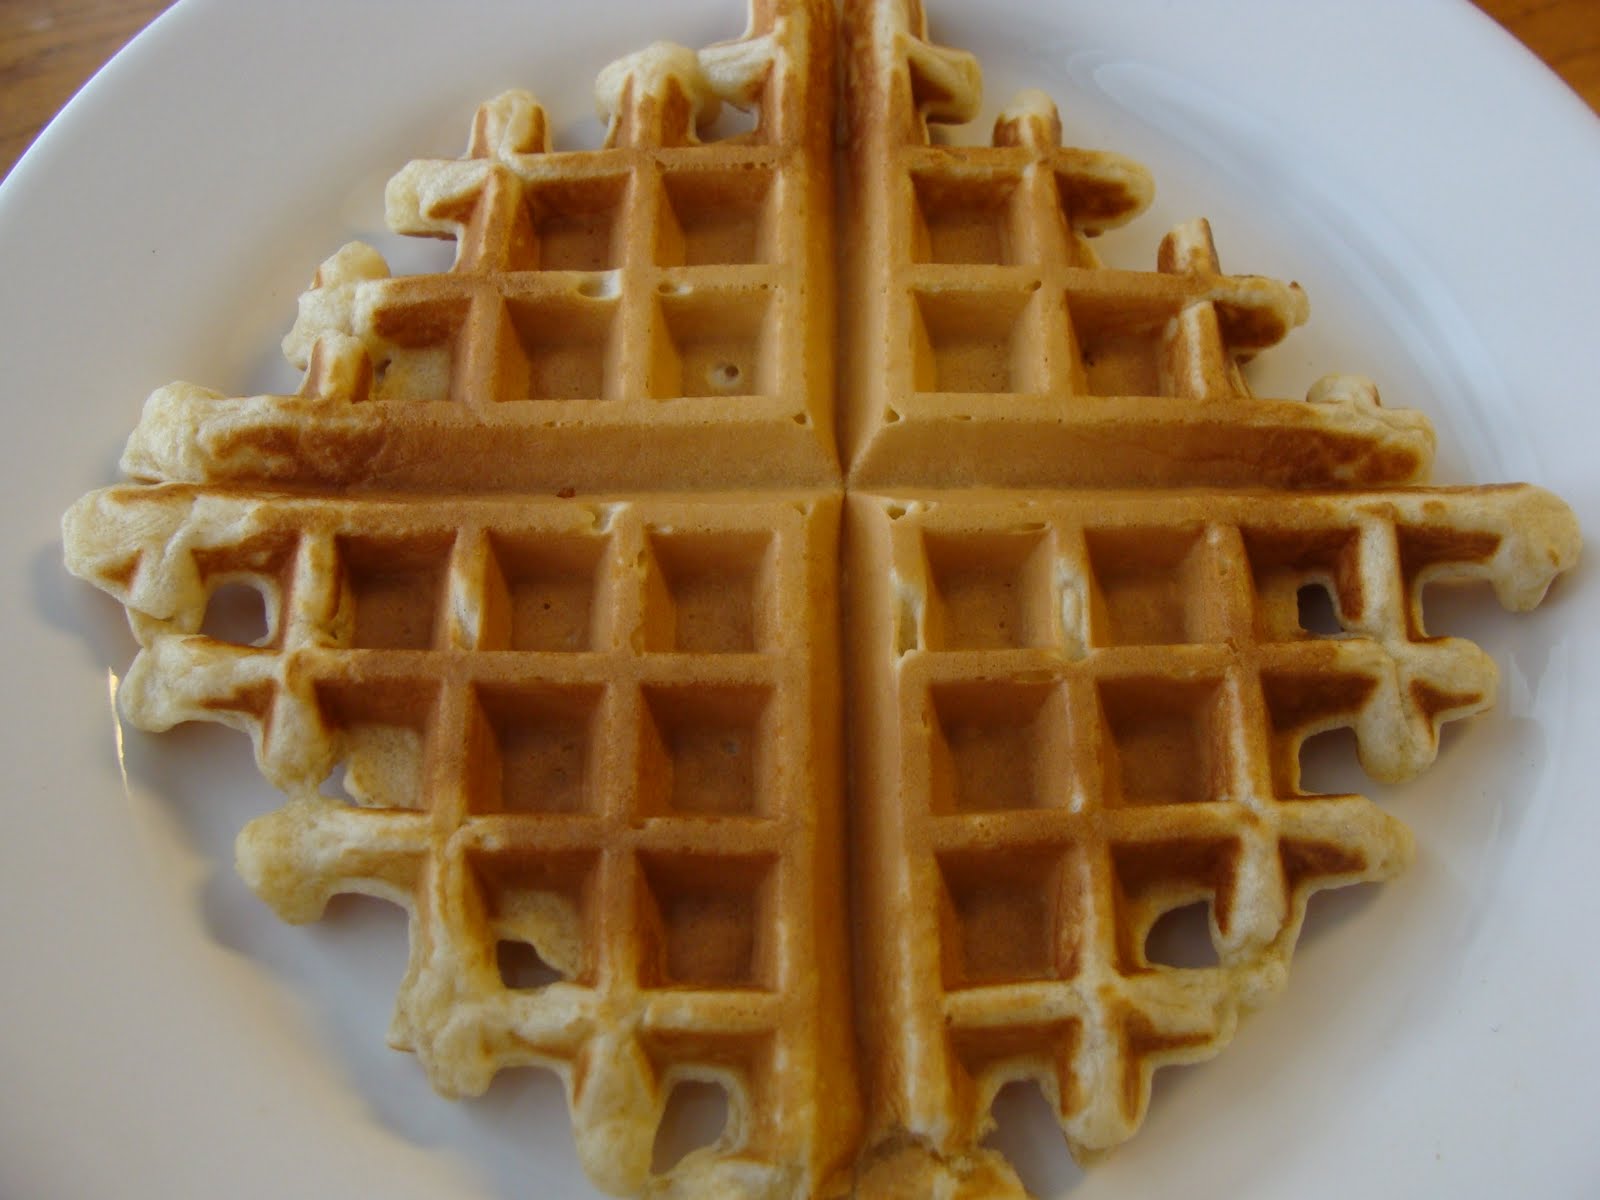
My son loves waffles and the cost of buying them at the store really adds up so decided to buy a waffle iron. I made batch after batch, loving the fact that I was making them myself. But it occurred to me that although they were homemade, they didn't contain nearly the amount of fiber and protein as the brand I was purchasing at the grocery store. After a few weeks, I noticed that I wasn't making as many waffles as I thought I would. I had a plan to spend a Saturday morning a month busting out a ton of waffles and then freezing them. It didn't happen and I never found the motivation or encouragement to spike the waffle batter with blueberries, strawberries or flax seed (all in my original plan). So back to the store I went...to return the waffle maker. I don't consider the experience a failure. I just figured out that I'm not the waffle queen.
While flipping those a Southern Living magazine a while ago...almost 3 years ago...I stumbled upon a recipe for Black Bean Chimichangas. Being a vegetarian and a fan of black beans and Mexican fare, I decided to give it a try. It looked easy enough and versatile.
I love this recipe. I've made this dish about half a dozen times and it has never disappointed. It's very simple to make if you use a can of black beans (I like Whole Foods Spicy Organic BB). I use large whole wheat burrito shells and can make about 5 chimichangas per batch. The variation of ingredients you can use is limitless. I've made them vegetarian, with shredded pork left-overs, ground beef and chicken. You can add what ever fresh ingredients you like to change the flavor profile.
My son is a huge Curious George fan. We have three PBS channels that run Curious George episodes and this is a good thing since it's his favorite cartoon by far. So, what better theme to use to inspire his birthday cake?
A month before my son's birthday a friend decorated a Curious George cake for her son who was turning 3. She is a great cake decorator. We've taken one cake decorating class together, but she has much more talent and patience than I do. She found her inspiration cake through a web search and posted photos of her cake online. I decided not to reinvent the wheel, but to duplicate her cake as best as I could.
But first things first. I wanted to try a new Banana Sour Cream cake recipe. George likes bananas, right? I made one layer according to the recipe found on the Kraft Food website. THe second layer I added mini chocolate chips to.
In an attempt to get my son to eat his vegetables, I decided to make sweet potato chips. Sweet potatoes used to be one of his favorite foods, until he learned all about birthday cake and crackers and other such items that contain no nutritional value.
I've made these before and love the tender and crunchy texture. The sea salt and lime make a wonderful combination on this tasty vegetable. It's nice that these are easy to make too.
My son didn't end up eating these...or anything else for dinner. It's a shame that one has to go to bed hungry when there were plenty of chips to be eaten with dinner.
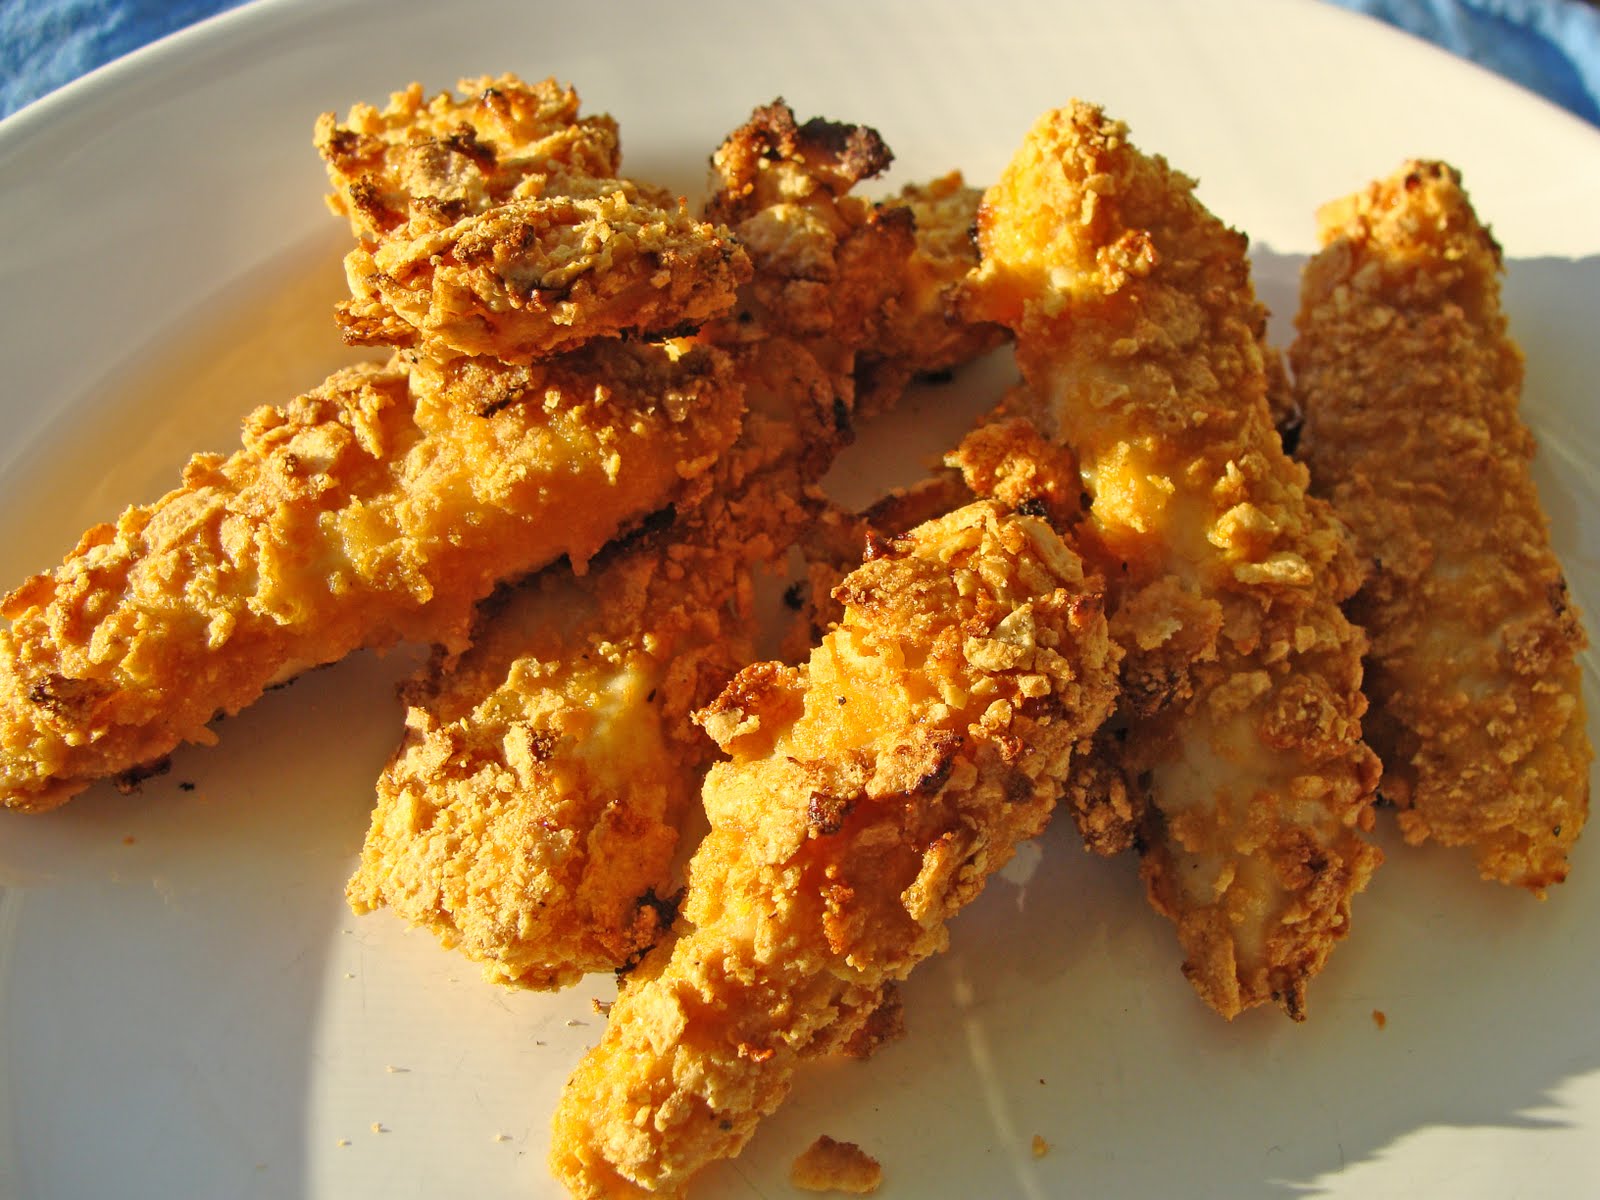
It seems as though every night is a struggle to get my son to eat something different. The cost of buying him organic chicken tenders really adds up quickly. In an attempt to get him to eat chicken tenders that I make, so that I know exactly what's in them, I decided to try a Parents Magazine recipe. If it's in a Parents Magazine and its a recipe for children, it's gotta be good, right?
This recipe was easy enough to make. A little dredging here and little tossing there and into the oven it goes. After that it went onto a plate with every child's favorite condiment - ketchup. Do you think he ate it? No. Did I try to entice him by mentioning it was rolled in cereal? Yes. Did my enticing work? No. After spending two hours in the kitchen making dinner (chicken tenders, a casserole and sweet potato chips), I wasn't going to make a PB & J. Eat it or go to bed hungry. Mommy is done playing restaurant every night.
My husband ate the chicken tenders and he really liked them. I'll be sure to keep this recipe handy and maybe, one day, my little one will eat some homemade chicken tenders.
I like cheesy potato casseroles. One problem though. Most call for cream of chicken soup. Being a vegetarian, I'm not one to dig into a casserole if I know there's something in it that contains meat/fish/poultry. I decided to alter a recipe to see how it would turn out.
I'm a fan of the Kraft Foods website. Not because the food always turns out great, but mostly because the dishes are pretty easy. I'm all about easy recipes.
These are the substitutions I made. I didn't use store bought Southern Style Hash Browns. I opted for organic Russet potatoes, and left the skin on (easier and healthier). I substituted Cream of Potato soup. It seems like a good sub since I was making a potato dish. I didn't use any butter on the topping. I'm sure it would taste great, but do we really need it? Not really. Also, my original recipe called for cheesy crackers for the topping (like Cheez-Its). On the website it calls for Ritz. I just used a natural cheese cracker.
In making this recipes, I followed the measurements exactly. If I was going to make this again, I'd bake it for less time and add either more soup or sour cream.
Overall, a tasty side dish that would be great to take to a pot luck or holiday meal.
I love Mexican food! I can't decide whether I like Indian food more than Mexican or not. I want flavor and I want spice!
My Mother-in-Law finds the best recipes and this one is no exception. She made it for me after I had come home from the hospital after having my son, almost three years ago.
I decided to make this since I had all of the ingredients and a new casserole dish I want to try out. It's easy to put together and easy to vary the recipe to suit your taste. My husband thinks this should be a dip, since he like to eat it with chips. I like to think of it as a basic rice and bean casserole. Toss in some chicken for the meat-eaters and maybe it'll "seem" more like a complete meal.
Mexican Casserole
15 1/4 oz corn, drained <--I used a bag of frozen organic, it's probably a pound 15 oz black beans, rinsed and drained <--Use Whole Foods Spicy Black Beans to kick it up a bit 10 oz whole tomatoes with green chiles <--I dice fresh tomatoes and buy the chopped green green chiles 8 oz sour cream 8 oz picante sauce <--I use organic medium salsa 8 oz (2 cups) shredded yellow cheddar 2 cups cooked brown rice 1/4 tsp black pepper 1 bunch green onions, chopped 8 oz monterey jack cheese, shredded
-Combine the first 8 ingredients and spoon into a lightly greased 13x19 pan. -Sprinkle with remaining ingredients. -Bake @ 350F for 30-35 minutes.
First off, why does the word "casserole" look so strange to me? Isn't it weird when a common word looks so uncommon?
It seems to me that casseroles are easy to make and can spare me from cooking dinner two nights in a row or I can freeze portions for a quick home-cooked meal on another night. I try to make dishes like this for my husband on the nights that I work. He needs something that requires no prep and little work on his part. I assemble the casserole and leave him a note with the baking time and temp. With casseroles that I make exclusively for him, I put in things I don't eat so that he can eat things he enjoys. ie) chicken and broccoli. I've adapted this from a recipe I found online. I don't use butter in casseroles. I always substitute brown rice instead of white. I always use as many organic ingredients as possible.
Chicken Broccoli Divan 4 cups steamed broccoli florets 1 1/2 cups cubed cooked chicken (approx 2 boneless, skinless chicken breasts) 1 can organic Condensed Cream of Chicken Soup 1/3 cup milk 1/2 cup shredded cheddar cheese whole wheat panko breadcrumbs, enough to cover
-Place the broccoli and chicken into a 9-inch pie plate. -Stir the soup and milk in a small bowl. Pour the soup mixture over the broccoli and chicken. -Sprinkle with the cheese. -->I just mix all of the ingredients together and sprinkle with the breadcrumbs. -Sprinkle the bread crumbs mixture over the cheese. -Bake at 450°F. for 20 minutes or until the chicken mixture is hot and bubbling.
I just had to buy this. I was walking through the bakery department of Wegman's and I saw this super cute cookie. I had to buy it! One day it will inspire me to recreate it. I should've asked the bakery lady what kind of icing they use so that it doesn't become a smeary mess.
One of my neighbors was going out of town last weekend and needed to unload some of her abundance of homegrown vegetables. When presented with over four pounds of zucchini, the first recipe that popped into my head was zucchini bread. I've had two zucchini bread recipes sitting in my recipe book for a long time. It was time to try them both out and have a taste test. But...things didn't go as expected.
The first loaves of bread I baked looked delicious. I took a recipe from allrecipes.com that got rave reviews. It turned out to be too cakey in consistency and too mild in flavor for my liking. The second recipe came out of one my Mother-in-Law's recipe books. Although the second batch had more flavor, it lacked the moistness of the first batch. My son loved then both, so it wasn't a total waste.
Overall, I wasn't impressed by either recipe so I decided not to share any to my neighbor who was kind enough to give me the zucchini in the first place.
The family and I went to Bluemont, VA to go peach and blackberry picking. Blackberries are one of my favorite fruits and at Great Country Farm they grow their blackberries without any pesticides. It was a hot and sunny day. I had never seen so many peaches in my whole life! After taking a wagon ride out to the peach trees, we were told that yellow peaches were in row 3 and white peaches were in rows 5 & 6. You'd be surprised how many people went into aisles that were not ready to be harvested. Great Country Farm should label the rows, give a warning about the incredible amount of bees and remind children not to climb the trees.
After picking through our stash of peaches, we chose the best eight to take home. Some were firm, others were softer. They all tasted delicious! But before heading home to eat our peaches I had to stop and get some blackberries. I never knew that blackberries were red until ripe.
I walked down three picked-over rows of blackberries. I was melting in the sun and getting more disappointed every few feet I walked. I couldn't find any blackberries. Someone had mentioned that there was another blackberry field somewhere on the other side of the pond. I had no idea where it was, so I picked what I could and walked back to find my hot and dehydrated family.
After returning to the little country store to pay for my U-Picks, some people came up behind my with a whole flat of beautiful, ripe, huge blackberries! I was jealous and had to ask them where they picked them, as I showed them my under-ripe half-full pint container. "On the other side of the pond", they replied. What?! Where was this hidden gem of a field? They told me it was quite a hike and offered to let me top off my container with their over abundance of berries. I was so happy and touched by their kindness. Next year, I'll hike to the "other field", if I can find it!
Before bailing on my assignment of a Soccer Ball Groom's Cake I decided to give it another go using fondant. I've taken two Wilton cake decorating courses and "Fondant and Gum Paste" is course 3. Even though I haven't taken Course 3 or ever used fondant, and the only thing I know about it is that it doesn't taste good, I've decided it's worth a shot to try and make another cake.
Before I tell you a little about my fondant experience I must share with you a buttercream frosting recipe I made. I've always made the Wilton Buttercream frosting and I've never liked it. The taste is not that great and it's made with Crisco (evil, evil Crisco). I've made it with vegan shortening but the result was a grittier frosting. Not ideal to make roses with.
After doing an internet search I stumbled upon "Quick Vanilla Buttercream Frosting" via the Foodnetwork.com, courtesy of Gale Gand. Recipe at the bottom of the blog.
The buttercream frosting has only 4 ingredients and it tastes so creamy and good. I wish it didn't have whipping cream, only for the fact that I can't leave it out at room temperature for very long.
Fondant...
After baking a devil's food chocolate cake and giving it a "quick vanilla buttercream frosting" crumb crust, I put the cake in the refrigerator for a couple of days. I didn't have time to get to decorate it sooner.
Now I've read that you can't refrigerate fondant. If you do, when you take it out and it comes up to room temperature, the fondant sweats. My dilemma is timing, for making a cake for the wedding and transporting it. If the cake can't sit out because of the icing and it can't be refrigerated because of the fondant, what do I do? I'll worry about that later. My current problem is getting the shapes on the cake.
I copied the template provided with the ball pan onto wax paper. I rolled out my white pre-made fondant to about 1/4" thick. Using a knife, I cut out a few of the shapes. I used a little frosting to adhere the shapes to the cake. I did this one or two shapes at a time. I should've cut and attached them all at the same time. Why, you ask? Because I would've seen my problem sooner. The problem: the template provided works for a cake made for the size of the pan. After putting frosting in between the two 1/2 spheres, the ball is larger and therefore the template is off. If I had been piping on icing, like I did with my first cake, I could've marked the cake templates with toothpicks (as the directions say) and made any needed adjustments. Since the instructions don't mention fondant, there are not any tips for using this product.
I was excited after I put on the first three or four shapes. I started painting the black shapes. Why did I paint them? I saw someone else had painted them and her cake looked awesome. You can tint fondant but I didn't want to deal with the kneading of the fondant. Who's got time for that during a trial run? Uh, a patient person who is doing things right the first time. Not me.
As I was attaching shapes to the cake, the shapes started slipping as the frosting began to warm up to room temperature. I was dealing with smudging the black gel colouring as well. If I wasn't such an impatient person I would've realized that painting all of the black shapes at the end would've prevented the smudging. Hind sight. With the template problem, I attempted to resolve it by shaping the fondant to the size I wanted. It worked, but started to look silly the more and more pieces were being manipulated.
So after realizing that I was working with a few different situations that were all above my skill level and patience level, I decided to use the rest of the frosting to try to make the grass. By now the frosting was quite thin. I should've thickened it up by adding more powered sugar, but I didn't think of that until just now. The grass was cool and would've looked better is it had been thicker.
In the end, I think I'm going to have to pass on making a Groom's Cake for my Sister-in-Law's wedding. I hope I can tell her before she reads this!
I could spend hours looking at recipes on-line. Some nights I actually do! I stumbled upon this breakfast recipe and decided to try it. It was so nice and easy...and delicious!
I grated a fresh organic russet potato, instead of using store-bought hashbrowns. I used organic pastured eggs and chives. Instead of American cheese I substituted yellow cheddar. The outcome of a handful of ingredients turned into a wonderful breakfast with a great presentation! And, it cost next to nothing!
Even though I have a pinched shoulder and neck and would like nothing more than to be lying on a heating pad, I decided to try out a recipe from one of my Mother-in-Law's cookbooks.
"Cowboy Cookies" sound so cool, but in reality, they're basically oatmeal chocolate chip cookies. But, thinking ahead to a December Christmas Cookie Swap (even though it's still July), I decided to give this recipe a try.
It's so easy to make and they turned out so yummy. The recipe said it would make 60 cookies, but who wants a tsp-size cookie when you can have a tbsp-size cookie? I got 27 out of the batch.
Cowboy Cookies
makes 27
1 cup flour 1/2 teaspoon baking soda 1/4 teaspoon baking powder 1/4 teaspoon salt 1 stick butter, room temperature 1/2 granulated sugar 1/2 cup light brown sugar, firmly packed 1 egg 1/2 teaspoon vanilla extract 1 cup rolled oats 1 cup semisweet chocolate chips
1. Preheat oven to 325F. Grease cookie sheets.
2. Mixed flour, baking soda, baking powder and salt into a mixing bowl. Set aside.
3. With an electric mixer, cream butter and sugars together. Add egg and vanilla and beat until light and fluffy.
4. Add flour mixture and beat on low speed until blended. Stir in rolled oats and chocolate chips, mixing well with a wooden spoon. The dough will be a bit crumbly.
5. Drop heaping tablespoons onto the prepared cookie sheet, about 1 inch apart. Bake until just firm around the edges but still soft to the touch in the center, about 15 minutes - less for softer cookies. Transfer to a wire rack and let cool.
Being a vegetarian with two meat-eaters in the family can pose what I call "restaurant syndrome". Many times I cook or throw together three separate meals. Silly, I know. But I do what I have to do. My almost 3-year old toddler has become quite the picky eater and even though I'm a vegetarian, I dislike most vegetables. Thank goodness for my husband, who will eat almost anything I put in front of him. But, all of this non-allergy related mealtime madness gets us all to bed with food in our bellies.
Dinnertime hasn't yet evolved into a formal family mealtime. It does happen, it's sporadic. This is something I want in the future, but for right now I cannot get into the swing of eating at 6 PM. I prefer to eat later, after my son is in bed. Eating dinner is more enjoyable this way but then I guess we dedicate time to two dinner times. Justin's dinnertime is sometimes shared by just me or my husband or both of us. Someone is always keeping sure Justin isn't blowing bubbles out of his glass or swinging around his fork.
Tonight for instance, Justin and Jason are having dinner together. I made mini-meatloafs that can be easily frozen and reheated on the nights that I work. I also love the portion-control that the muffin tin provides. Jason and Justin both really like them and they're so easy to make. Jason's having them with broccoli. He's the only one in the house who will eat broccoli but he would never steam it for himself, since that's "too much work". Justin is having the meatloaf with baked beans. Jason won't eat baked beans...and so the restaurant syndrome is in half-effect. Full-effect examples will appear at some point...maybe tomorrow! So, I eat neither mini-meatloaf nor broccoli and so I'm eating something else whenever I get hungry.
I'm beginning to think I'm making life more complicated then it needs to be. Proper planning would eliminate some of my "restaurant syndrome". But, alas, that's for another better planned evening.
I make our meatloaf with all organic ingredients. I used real organic ground beef, since my family eats only a small amount of red meat. I use the "BBQ" version of the recipe with Arrowhead Organic stuffing mix. In 2008 I was only able to find this brand around the holidays, so last year I stocked up on about 5 bags of it to get me through the year. I have since seen it in Wegmans, but I got all of mine on sale and it won't expire until 2011.
I was asked to make a Groom's Cake for my Sister-in-Law's wedding. Her fiance loves sports, especially soccer.
I searched online for a cake to more or less copy. The plan...to decorate a sheet cake with standing green grass and a 3-D soccer ball on top.
After purchasing a Wilton Ball Pan, I gave baking it a go. The 30-40 minute back time was really 50-60 minutes. Not a problem. I knew my challenge would be getting the image on the cake and transporting it from Fairfax to Alexandria.
After baking, it was time to put on the crumb crust. A crumb crust is essentially a thin layer of frosting that you put on before actually icing the cake. This process prevents the icing from sticking to the cake and pulling off the crumbs. I bet you wish you had known about this secret sooner!
After putting on the crumb crust, my ball looked like an egg, more oval than round. I'm sure you can picture it perfectly in your mind.
I'm impatient and I want things done correctly. Decorating this cake did not bring out the best in me. I traced the soccer ball template onto wax paper and did the outline in clear gel. I did this because my impatience got the better of me. Had I closely and slowly read the decorating instructions, I would've seen that you take the template to the cake and mark it with toothpicks. I quickly read over this part, didn't quite understand it and went with a technique I learned in cake decorating class. That tracing technique is great on a sheet cake, but not a 3-D ball.
As I was icing it the frosting was warming up from the heat of my hands. The white icing was turning off-white and I was getting tired and frustrated. I finished what I could to take a decent photo and then I stopped. I used the wrong "grass" cake tip but after 1 1/2 hours I couldn't be bothered.
All-in-all, it did turn out better than expected, but not for a wedding. This would be fine for a child's birthday, but again, not for a wedding.
I went out and bought pre-made fondant. I think cutting out the shapes will be easier. There's going to be a wedding cake, so I'm not worried about how this one will taste. For me, this is all about appearances. Keep an eye out for an updated photo!
I have a recipe for Apple Brie Tarts. They're made with puff pastry and the reviews said the brie was bland and using crescent rolls was a quicky way to make them.
I, of course, chose the quicky way since I can only cook or bake during nap time. I chose to try a sharp cheddar to try and up the flavor factor. Granny Smith apples are tart and with the sharp cheese a nice balance was struck.
Every one of these was folded differently. I wanted to show the ingredients but only a couple turned out well.
These need to be eaten warm and were super simple to make. I'll try the puff pastry when I have more time.
Overall, not a bad little snack...minus those nasty trans fats found in crescent rolls. Maybe there's an alternative at Whole Foods. I need to look into that.
I'm still new to blogging. I can't figure out how to change a layout of an entry. I'm not a writer. I've been adding posts with photos from the past and it's evident that I paid no attention to taking the actual photograph. I wasn't thinking about making the food look good or if the lighting was nice. I've been only more aware of this recently. Hopefully you'll see better visual images in the future, that is, if I ever share my 3-day blogging secret with any one.
Food for thought: If I'm going to continue with a food blog, I should hit up some yard sales for some cool-looking plates, table clothes and baskets.
Question to self: Should I only post photos of food I've prepared or also food I've encountered and taken a decent photo of?
This was the second time I made this recipe from Good Housekeeping. The presentation is outstanding.
This is a little time-consuming (slicing the potatoes down as far as you can without cutting through them) and messy (getting all the garlic olive oil in between the cut). It's worth the trouble if making it for company.
I wish I could say this cookie was as good as it looks. Sometimes its best to follow a recipe and not attempt to make a guilty food healthier. I got this recipe from OceanSpray.com. I tried to make it a bit healthier by cutting the AP flour in half and subbing in whole wheat flour for the remainder.
 I don't get every recipe I make from Allrecipes.com or Kraft.com or from my Mother-in-law, although most of them I do. Every once in a while I'll find them in an advertisement for a particular item. For example, this recipe for Cajun Chicken Pasta came from a Sargento cheese ad, although I've made it without their cheese.